Overview
Stigg’s native integration with Salesforce streamlines sales processes by automating fine-grained provisioning of bespoke enterprise accounts directly from Salesforce.
Benefits
- Reduce time from opportunity close to account provisioned from days and hours to 0.
- Ensure alignment between the customer’s contract and the level of access that they were provisioned.
- Leverage the same entitlement management and metering infrastructure for access enforcement and usage reporting regardless of how your product is sold - via self-service, sales-led, sales-assisted, or all of the above.
Example use-cases
- Provisioning trial access when an opportunity reaches a POC status.
- Provisioning subscriptions upon opportunity close.
- Updating customers’ entitlements upon contract amendment and renewals.
Customization
The integration can be fully customized to your existing business process and needs by leveraging Salesforce Flow workflows.Integration with Salesforce CPQ
Stigg’s native integration with Salesforce works seamlessly with Salesforce CPQ.Availability
Stigg’s native integration with Salesforce is included in the Scale plan, and is also available as an optional add-on to the Growth plan. See Stigg’s pricing for more details.
Setting up the integration
Prerequisites
- A Salesforce organization with Enterprise edition or higher
- A user with admin access to the Salesforce organization, that you’ll be integrating with Stigg
Connect your Salesforce domain
In the Stigg app, navigate to the Integrations section and click on the Salesforce tile. Enter the domain of the Salesforce instance that will be integrated with Stigg. Click Continue.Install the Stigg app
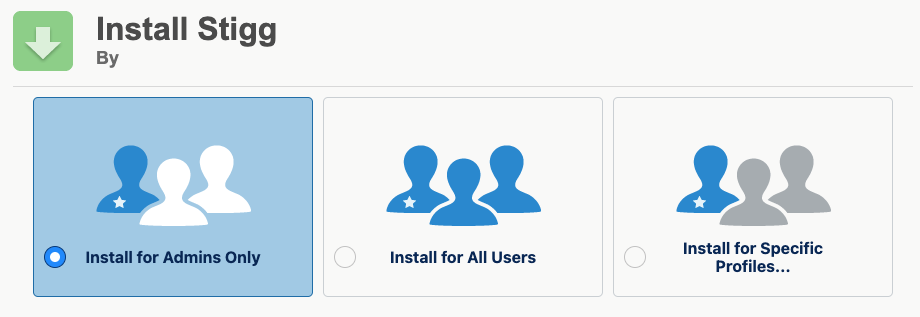
Install the Stigg app for Salesforce by clicking on Stigg app for Salesforce installation link: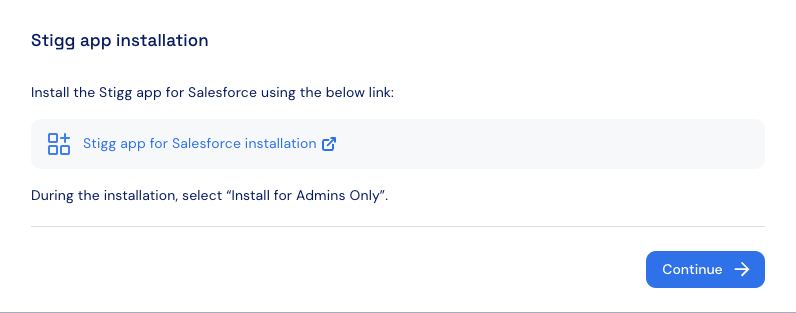
Configure API key
- In the Stigg app, copy the generated API key.
- In Salesforce, click the settings icon in the right corner of the screen.
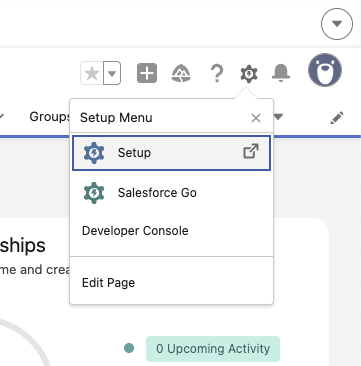
- Click Setup.
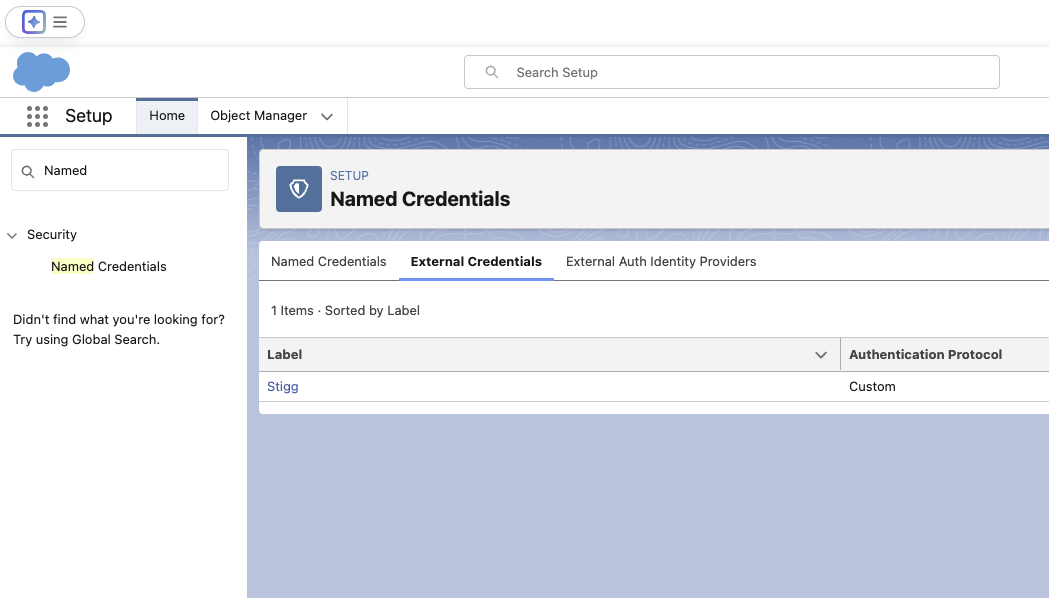
- In the search bar on the right, type Named Credentials and select it from the results.
- In the Named Credentials screen, click the External Credentials tab at the top.
- Locate and select Stigg from the list.
- Local the Principals panel and select the Edit action on the right side.
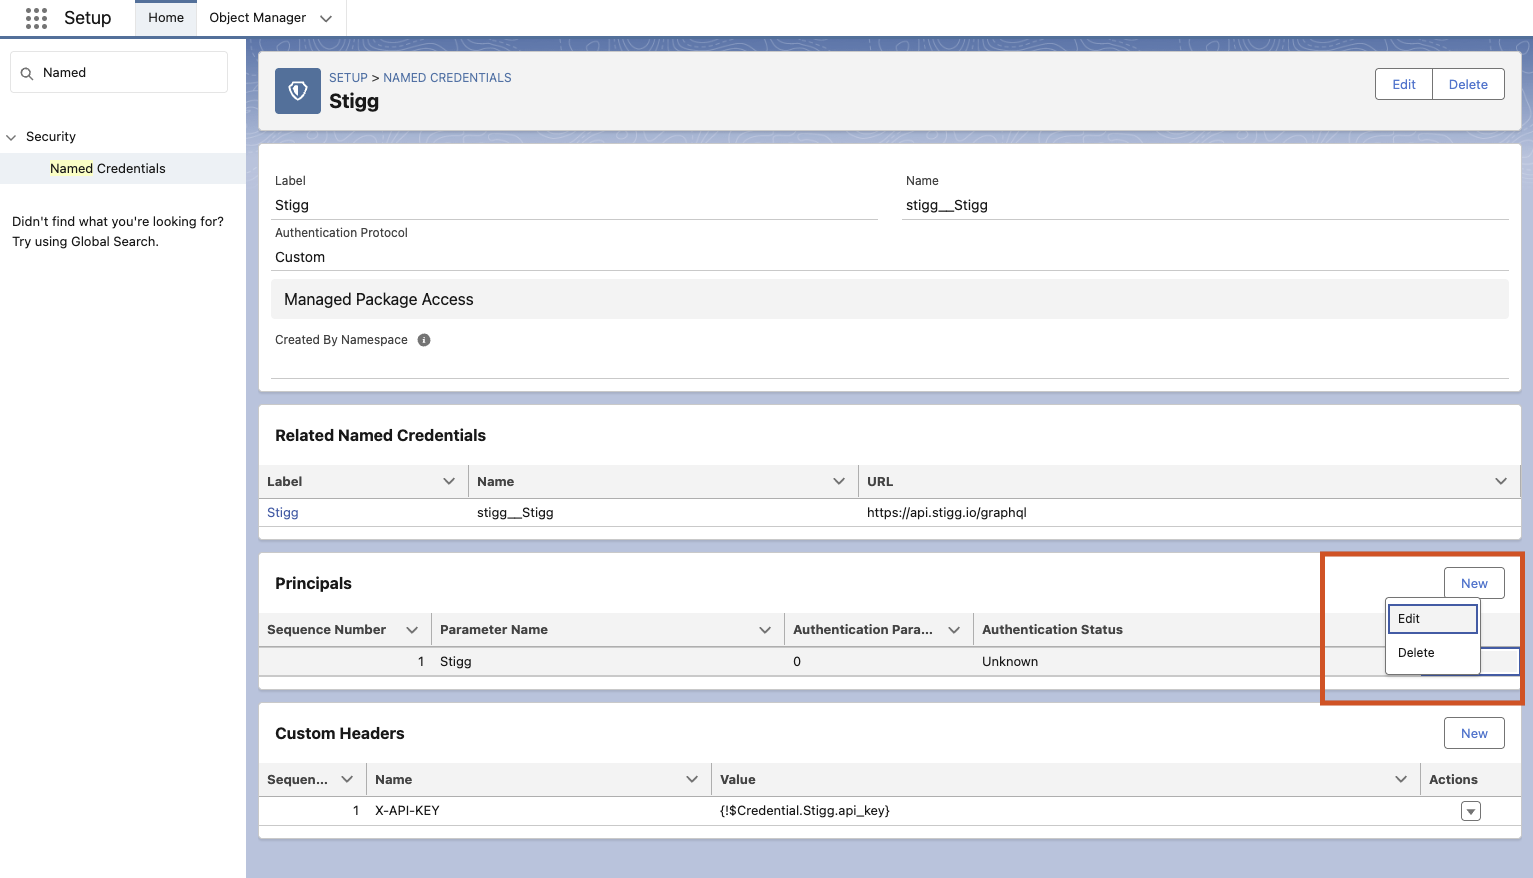
- In the Edit Principal modal, set:
- Name: api_key
- Value: Integration API key that you copied from the Stigg app
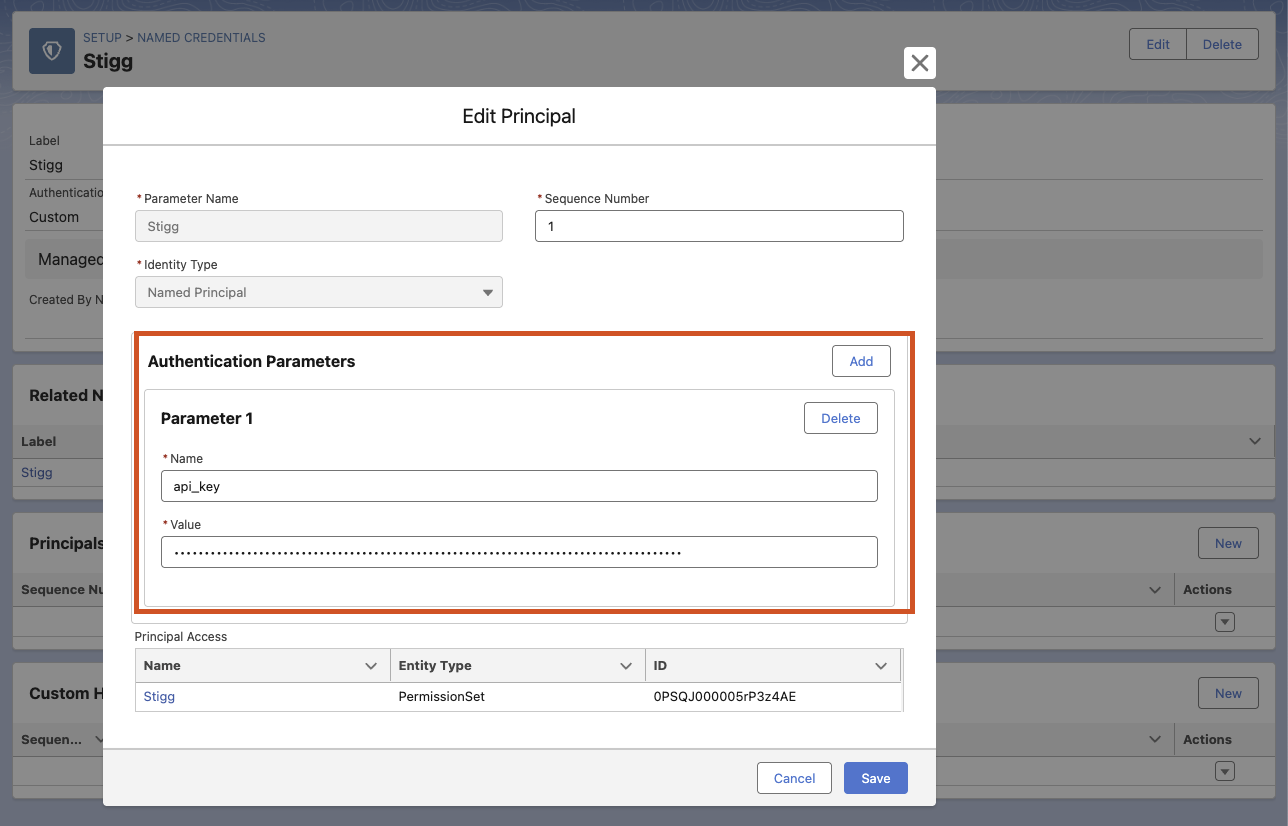
- Click Save.
- Go to Setup > Users.
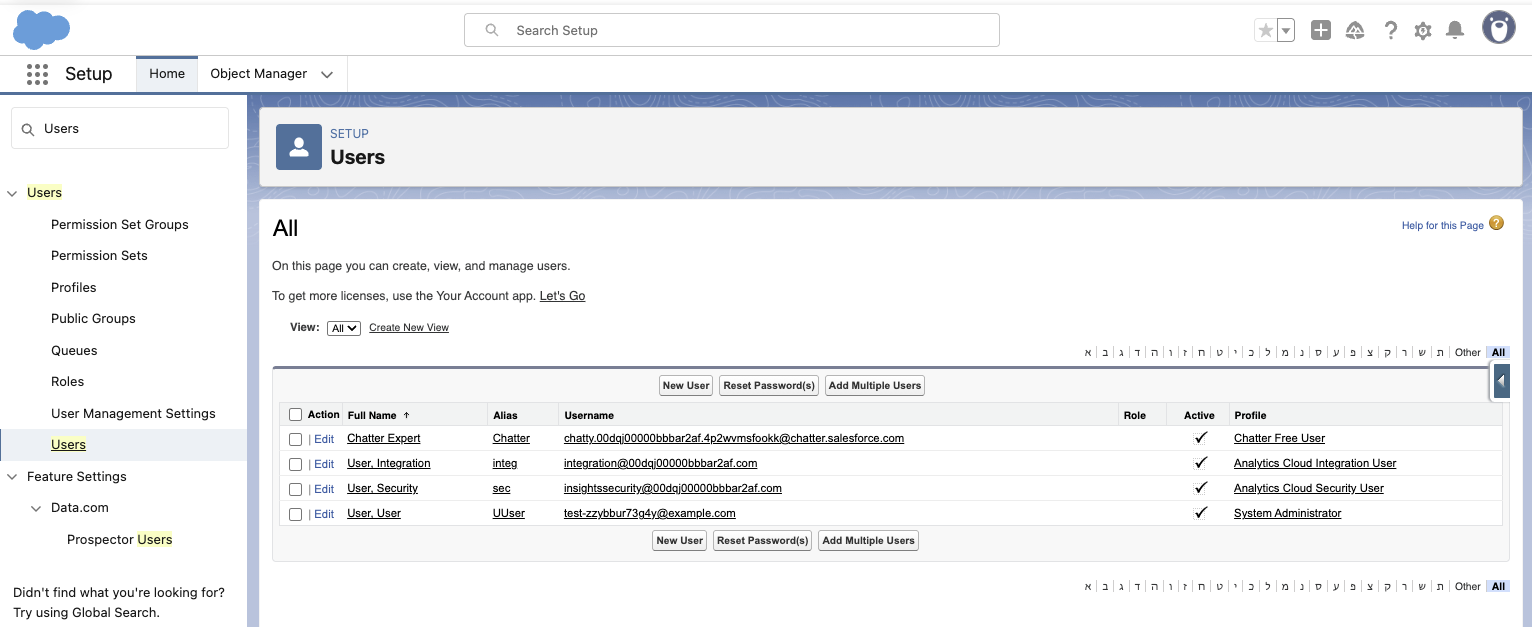
- Select the required user and click their name or email address.
- Locate the Permission Set Assignments section and click Edit Assignments.
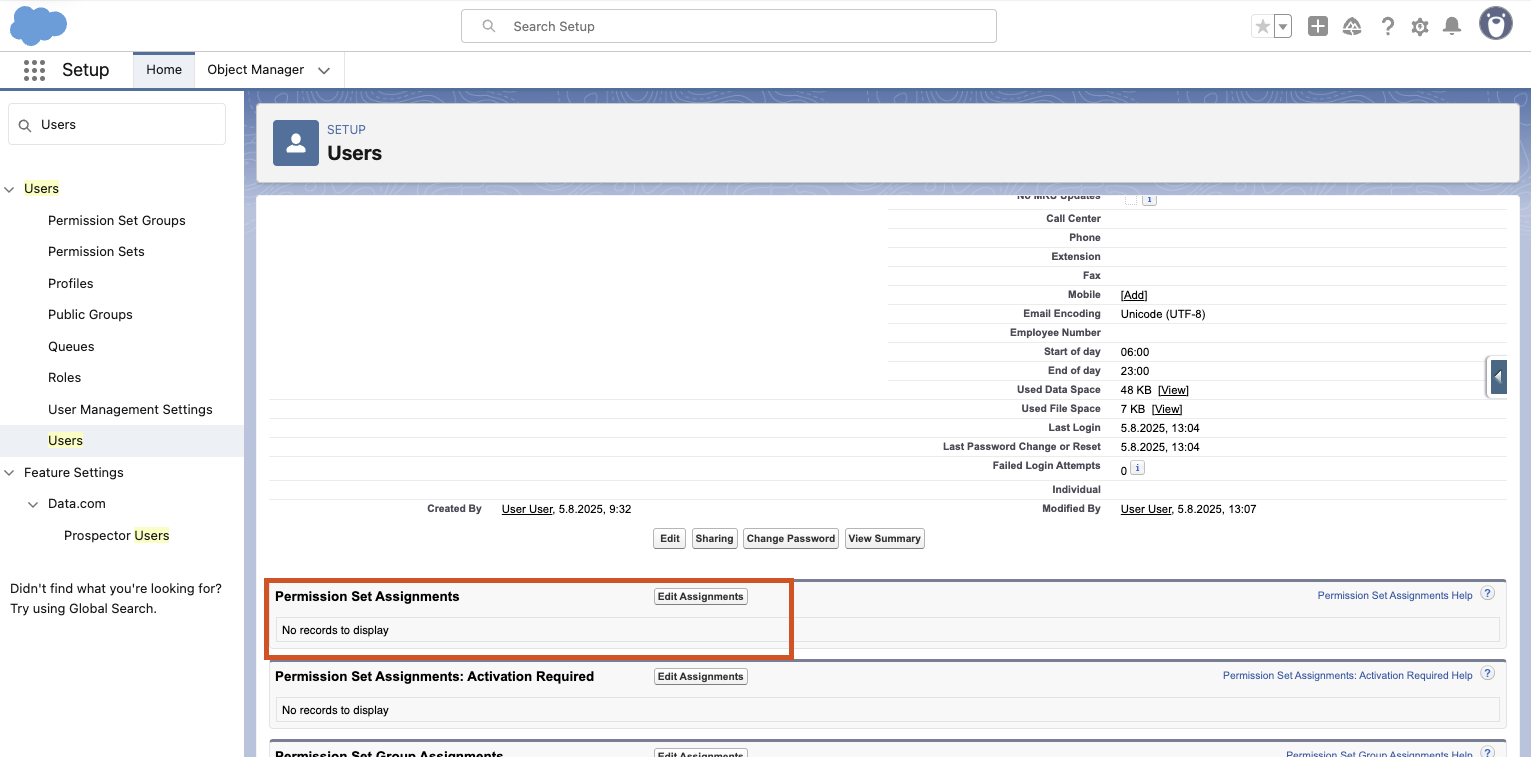
- In the Available Permission Sets section, find Stigg and move it to the right side.
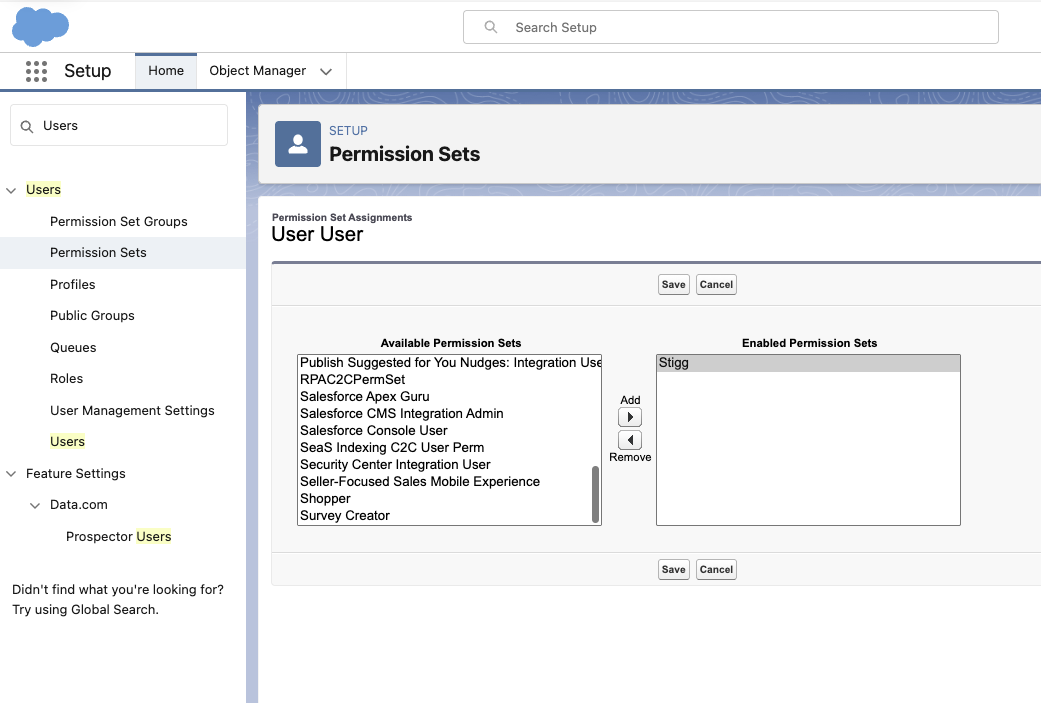
- Click Save.
- Now, on the user page, you should see Stigg listed under Permission Set Assignments.
Map Salesforce and Stigg entities
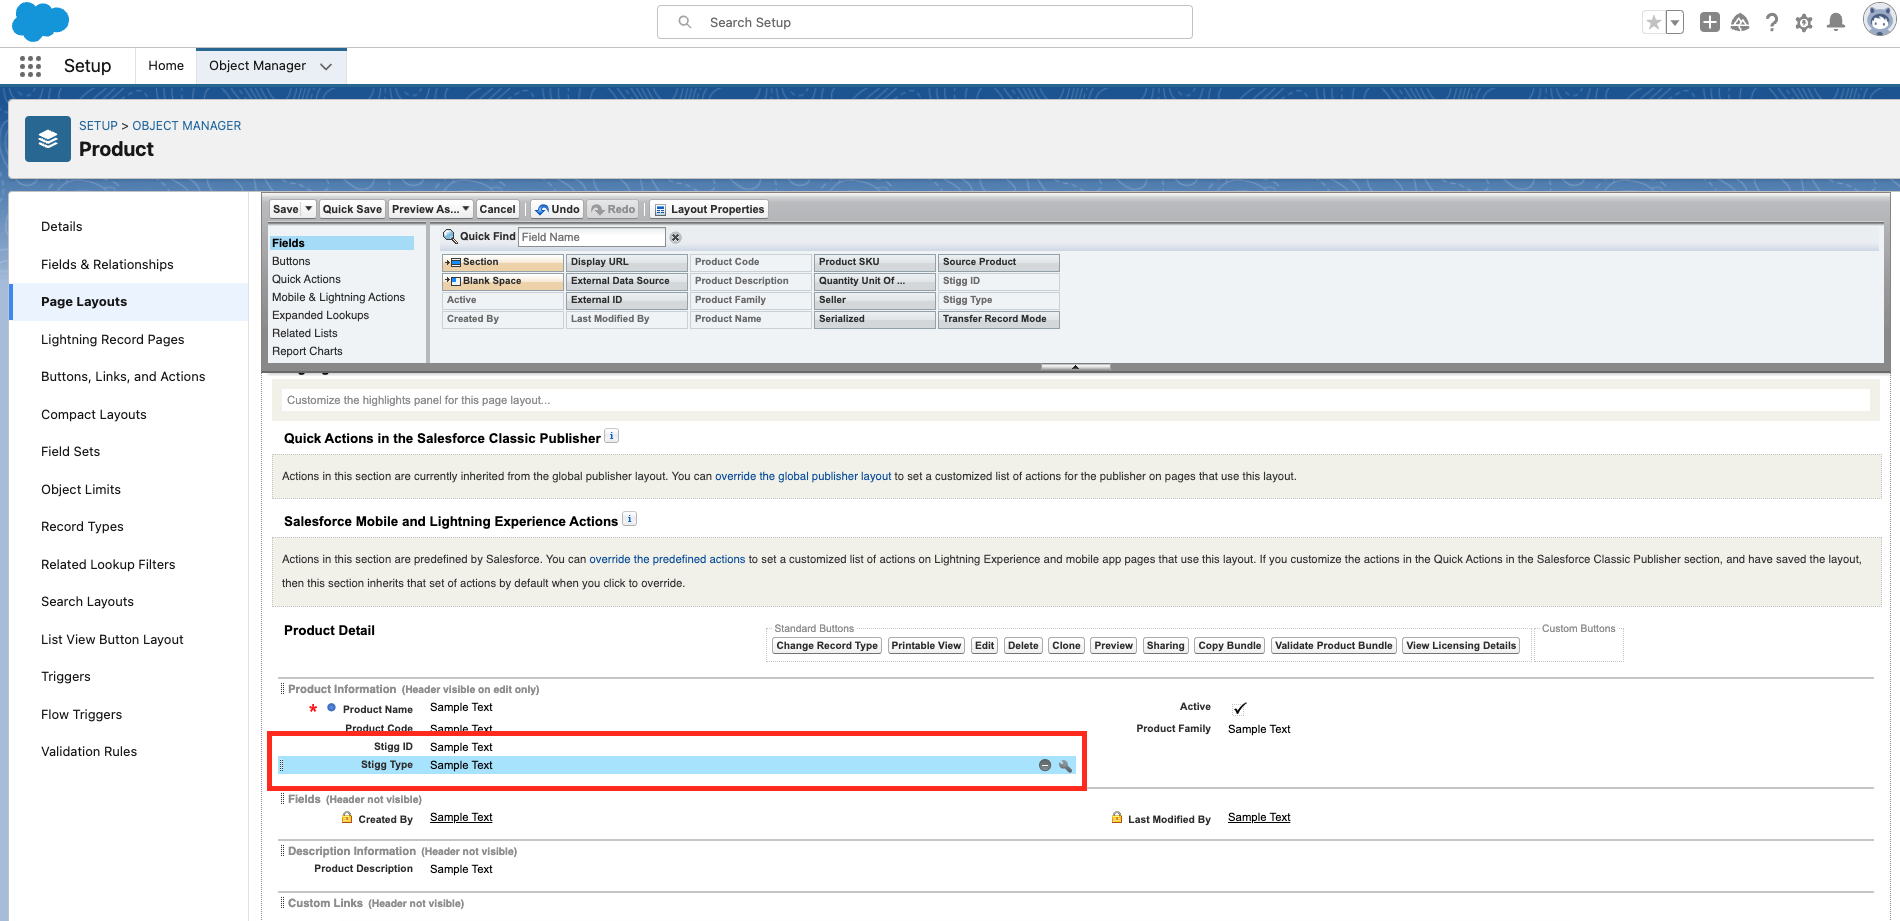
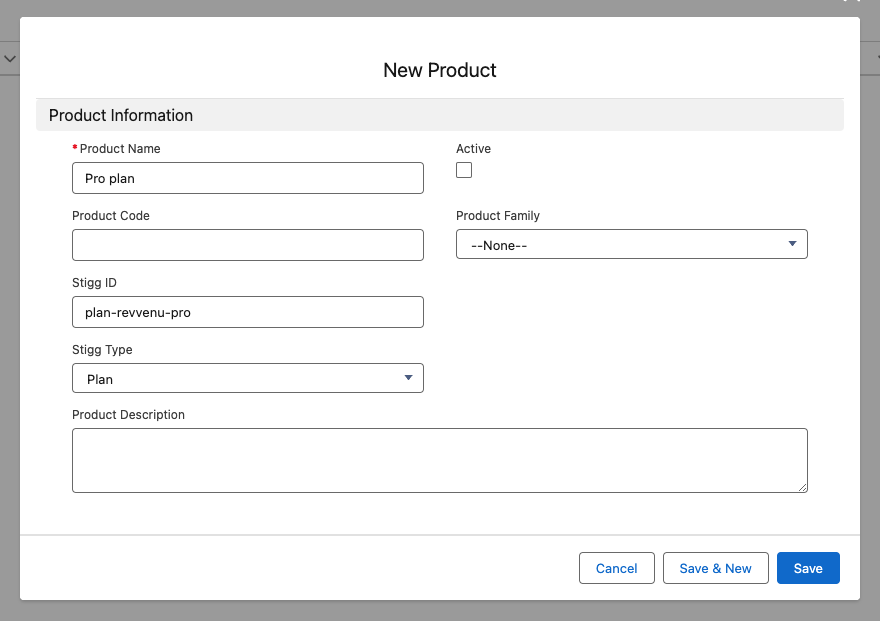
Provisioning entities in Stigg according to entities in Salesforce requires mapping between these two entities to be defined. This mapping is defined in Salesforce. In Salesforce, under the relevant Salesforce entity that you’d like to map to Stigg:-
Stigg type - an enum with following possible values:
- Plan - represents a custom plan in Stigg
- Add-on - represents an add-on Stigg
- Entitlement - represents plan’s a custom entitlement
- Credit entitlement - represents a recurring credit grant entitlement in Stigg. The credit amount is passed dynamically via the Subscription Credit Entitlements parameter during provisioning.
- Stigg ID - the ID of the matching entity in Stigg, for example: plans would start with a “plan-” prefix, add-ons start with an “addon-” prefix, and entitlements start with a “feature-” prefix
Create provisioning automation flows
In Salesforce click on the Setup icon and open the Setup action.
Default template
To help you get up-and-running, the Stigg app for Salesforce includes a default Salesforce Flow template for automating provisioning of customers and subscriptions in Stigg when an opportunity in Salesforce is marked as Closed - Won. This template can be fully customized to cater to your business needs.

- Triggered when the status of Opportunity in Salesforce changes to Closed won.
- Iterates over the opportunity’s products and compiles the input for provisioning subscriptions in Stigg using the defined entity mapping.
- Provisions a customer in Stigg.
- Provisions a subscription in Stigg.
- Updates the opportunity’s account with the Stigg Customer ID and Stigg Customer URL. The latter serves as a deep-link to the relevant customer in Stigg.
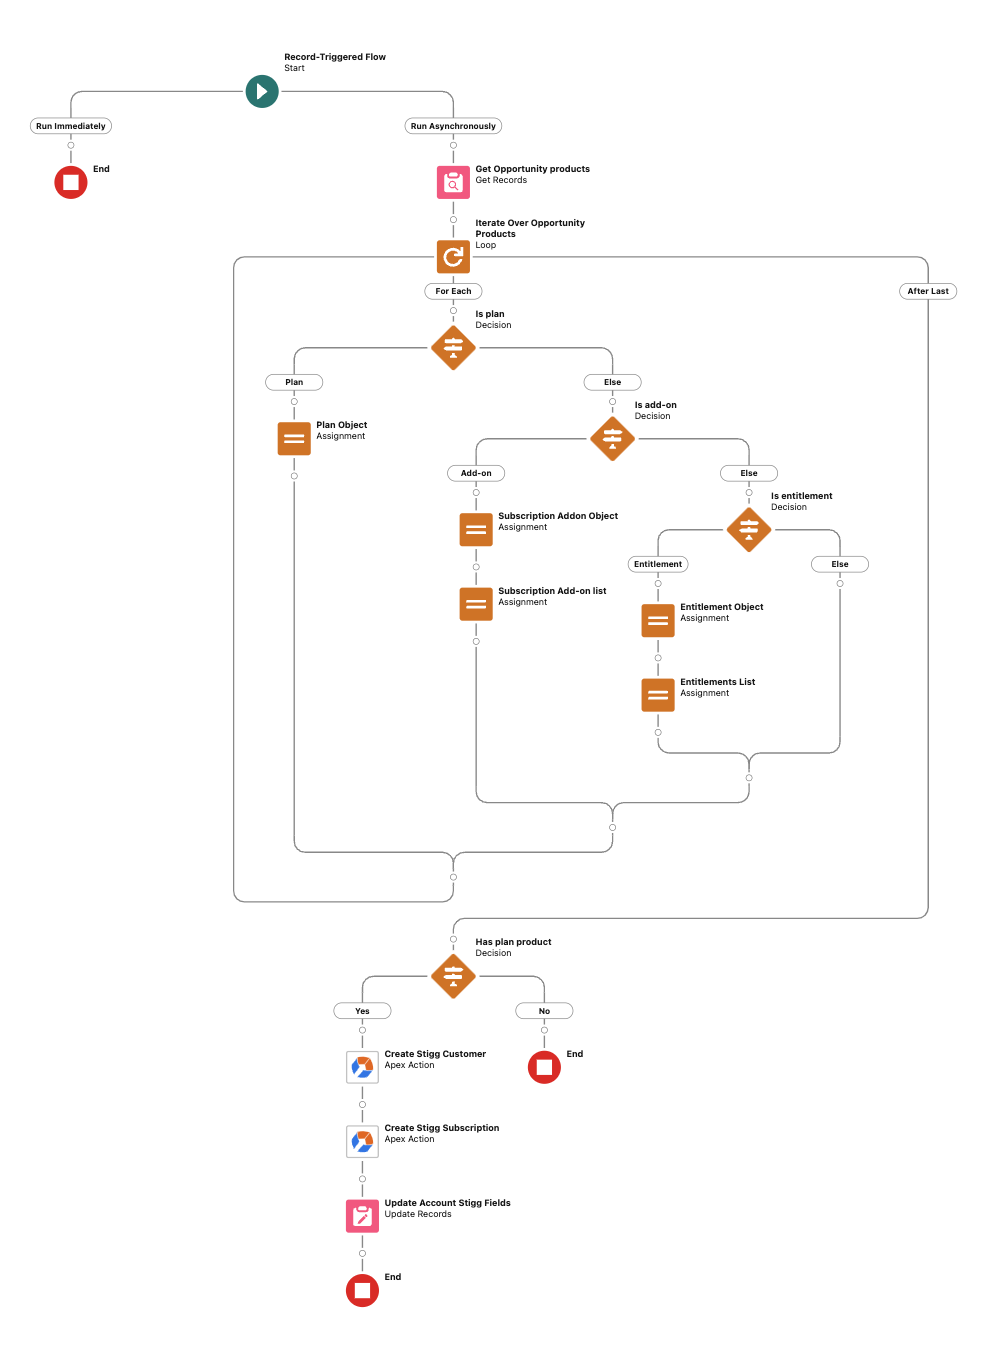
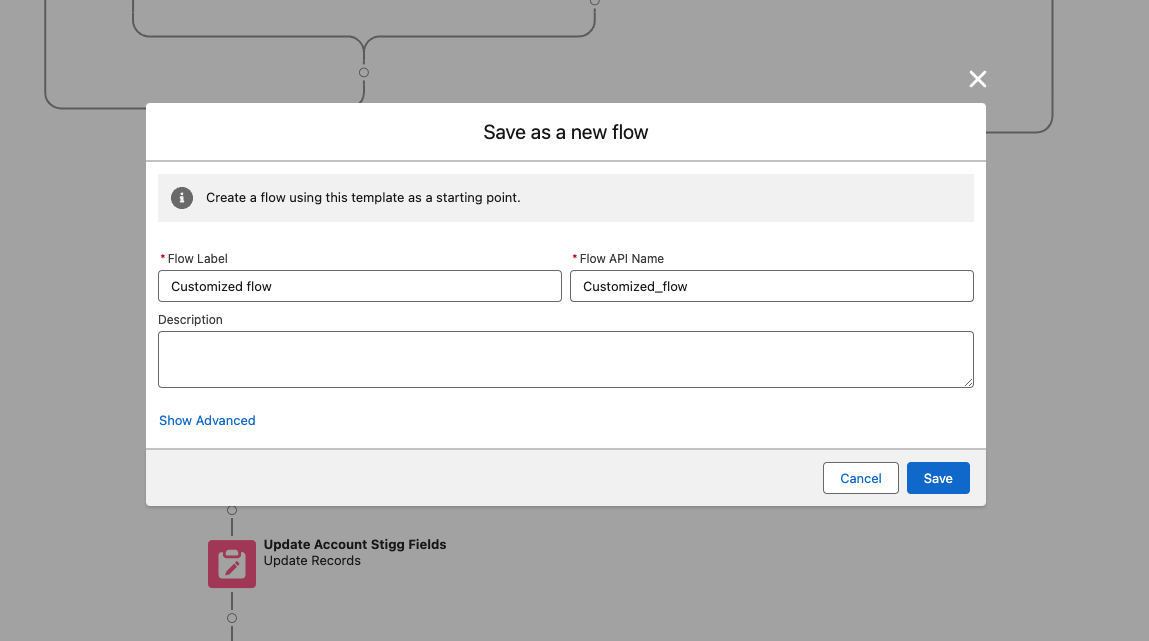
Default template flow in Salesforce
Creating your own flow
Leverage the default template flow to create flows that meet your business needs. To do so, apply the relevant changes to the default template flow. Specifically, provision resources (i.e. accounts, organizations, workspaces) in your application before provisioning the resources in Stigg (between steps 2 and 3 of the default template) by adding a new HTTP callout action which will make an API request to your application to provision those resources.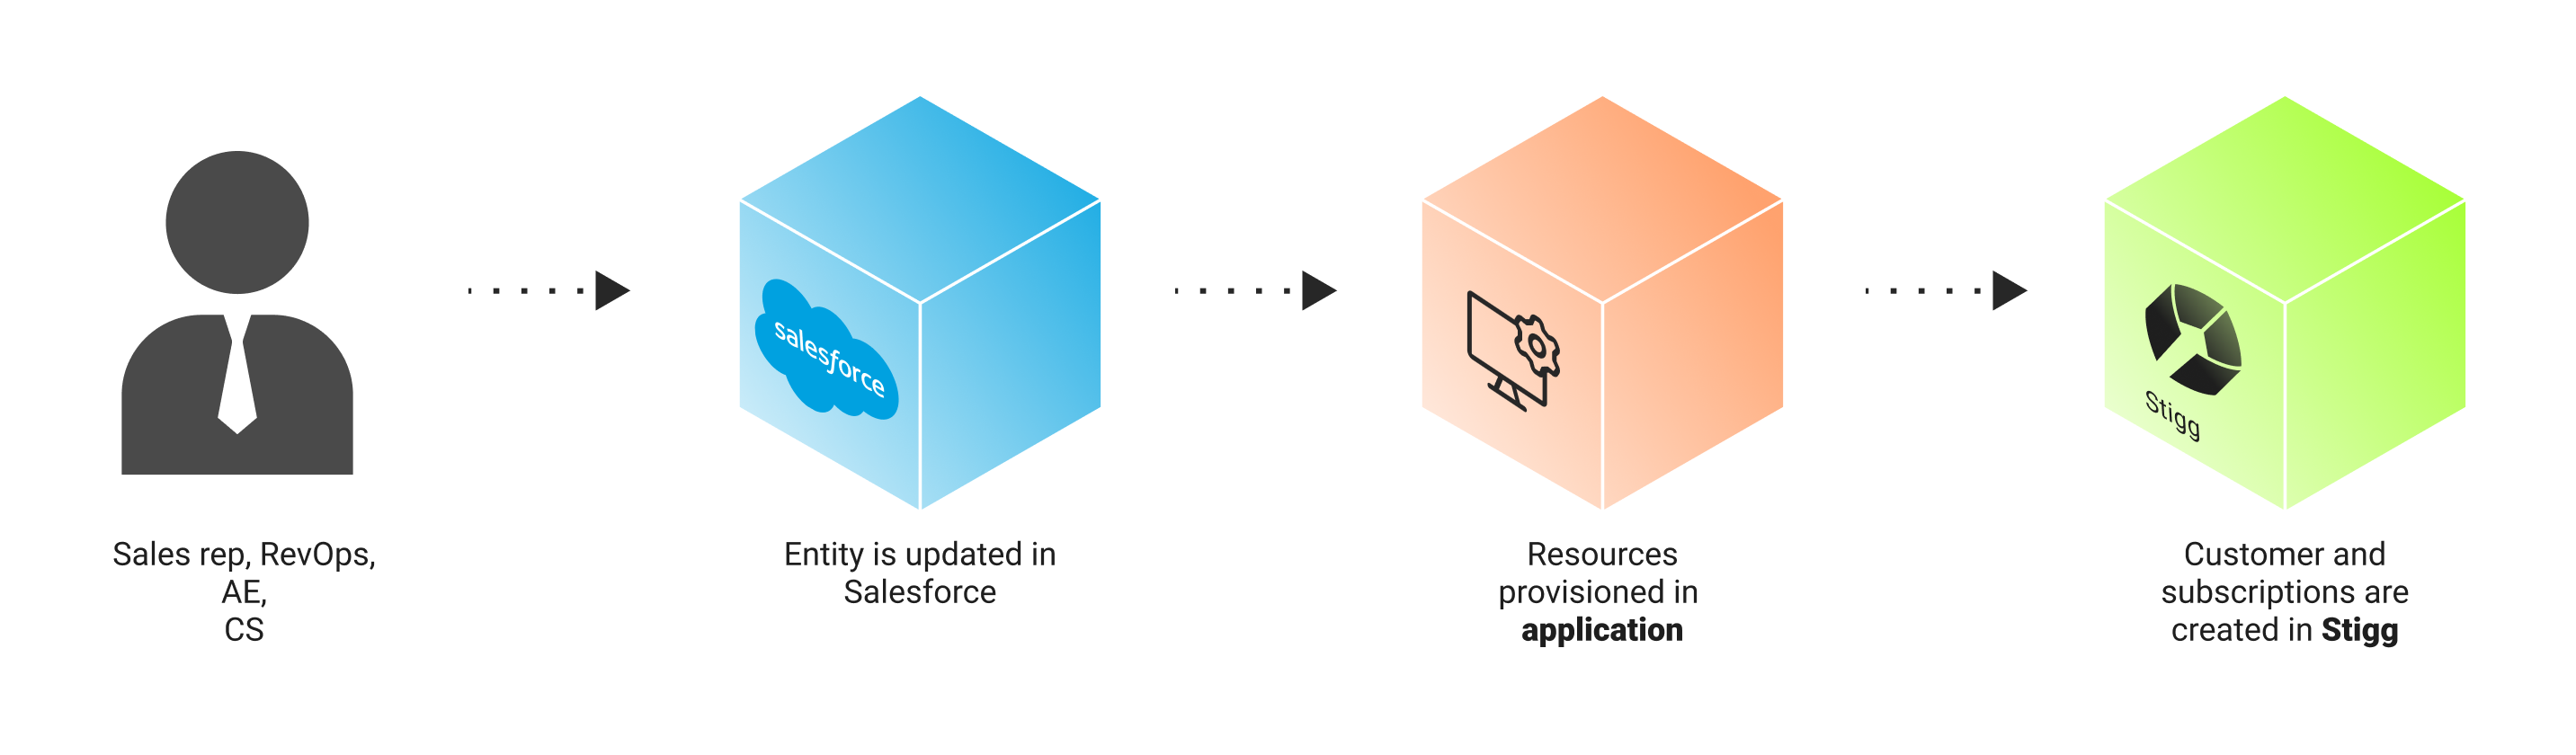

Deep-links
When customer and subscriptions are created in Stigg through the Salesforce integration, in both places you will see a deep link to the matching entity in the other system, so it’s easier to navigate and find the corresponding entity in the other system: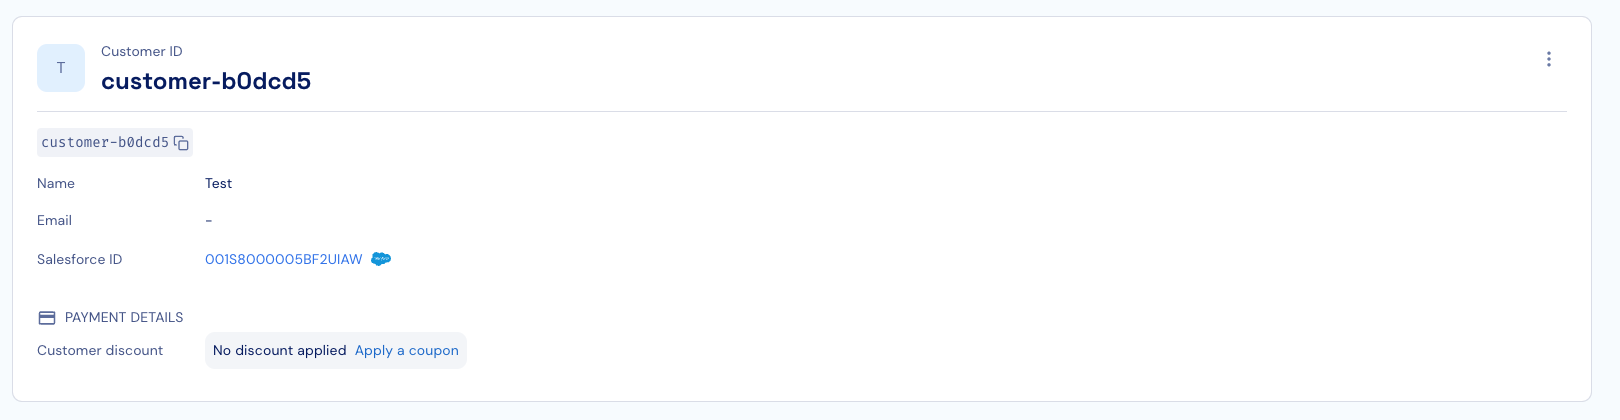
Customers in the Stigg app have a deep-link to the Account object in Salesforce
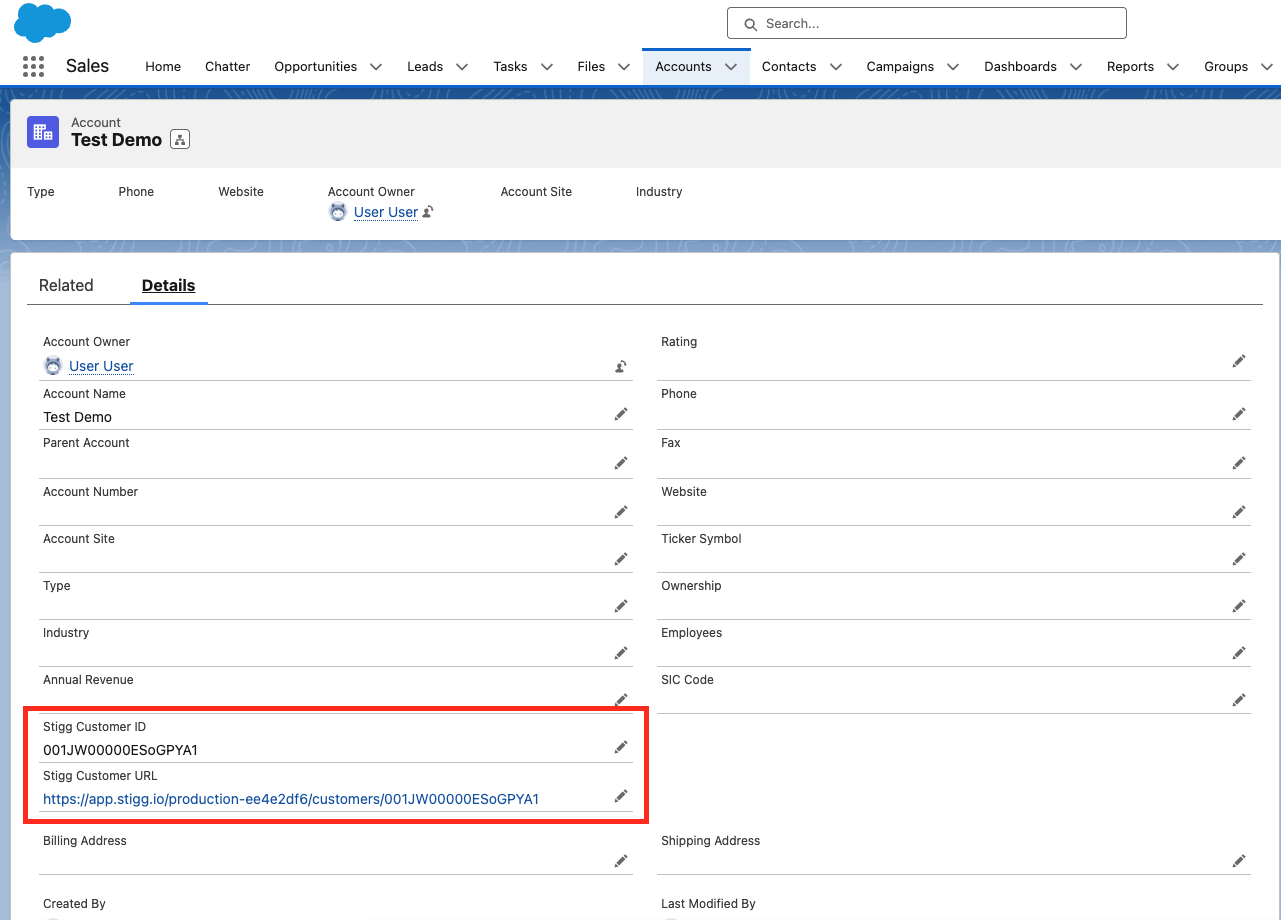
Accounts in Salesforce have a deep-link to the Customer object in the Stigg app