Overview
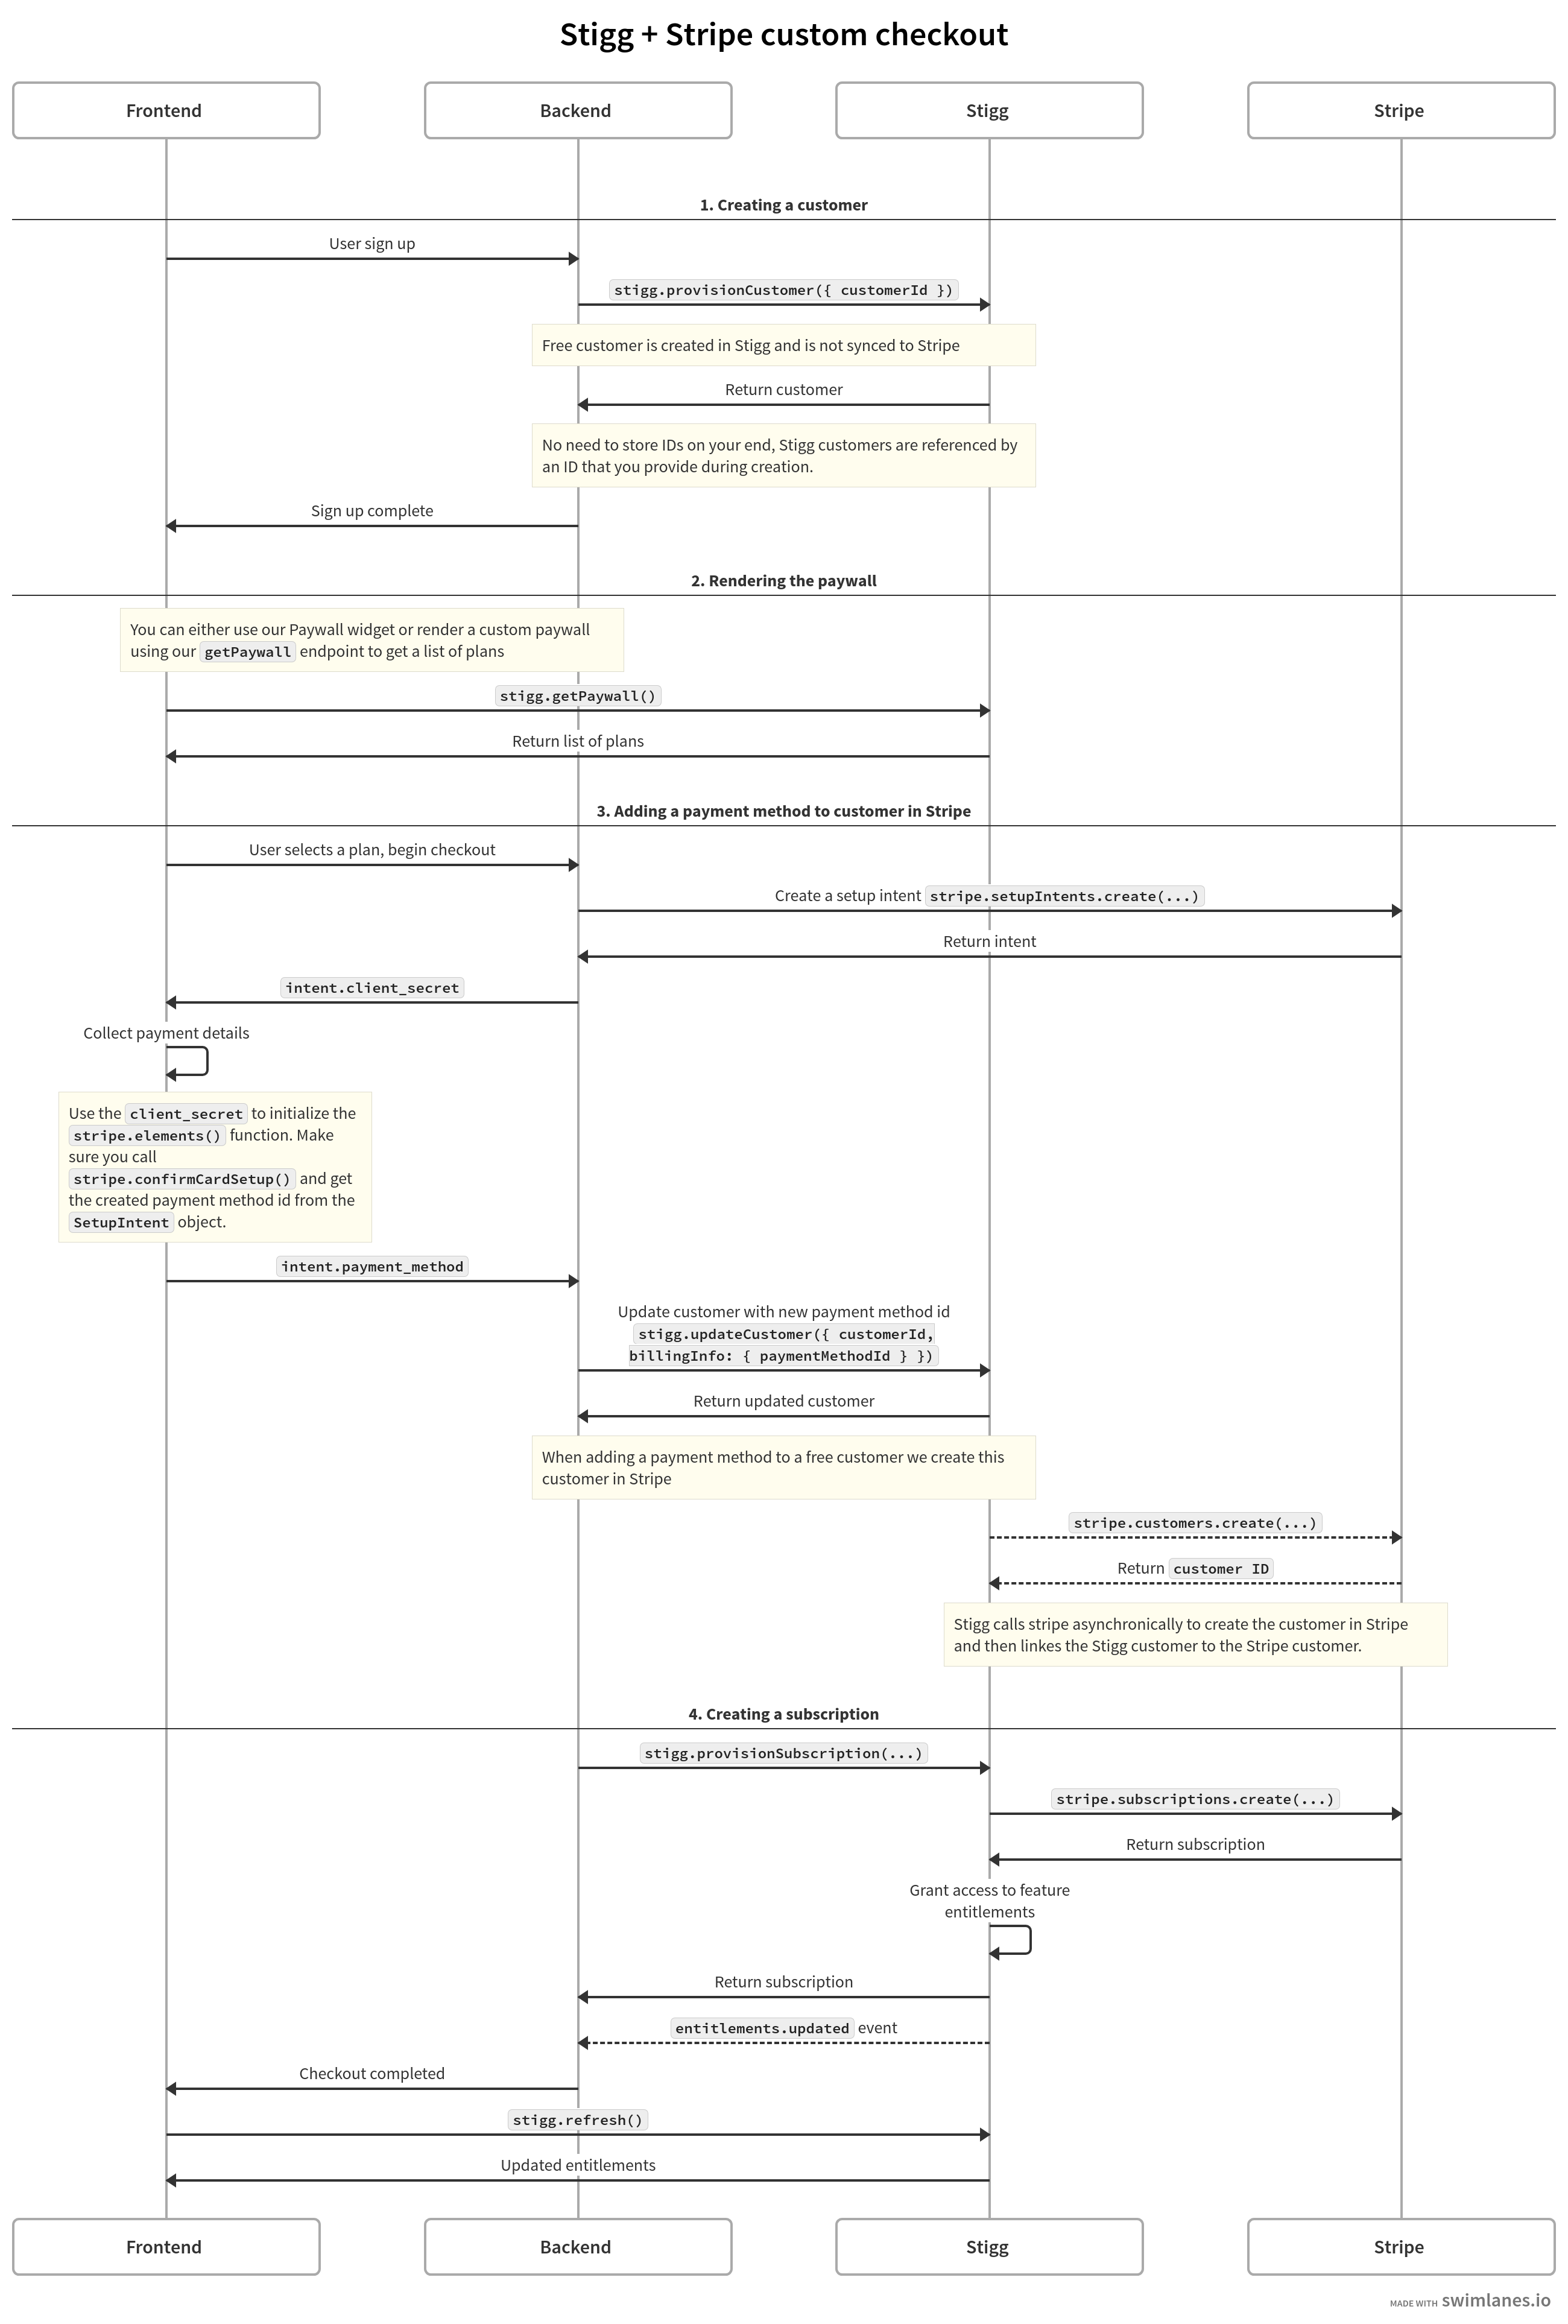
Stigg allows you to implement custom checkout experiences using Stripe Elements, while delegating the subscription lifecycle management to Stigg. Doing so will require the following process:- Collection of the payment method using Stripe Elements
- Updating the customer in Stigg using the Stigg server SDKs
- Provisioning or updating the subscription in Stigg using the Stigg server SDKs
Before we begin
In order to complete this guide in your application code, please make sure that you have:- Access to a Stripe account
- A Stigg environment that’s integrated with Stripe
- Modeled your pricing in Stigg
- Know how to provision customers in Stigg
- Know how to update subscriptions in Stigg
How it works
It’s typical to build the checkout form using Stripe.js elements and leverage the Setup Intents API to confirm the payment method and save it for future use. If you need help in setting this up, you can refer to this article to learn how setup intents work. In case you have a different setup in place, let us know and we’ll assist you with the integration to suit your needs. Once your checkout form is built, the journey of the customer should look similar to this one:Provision a new subscription
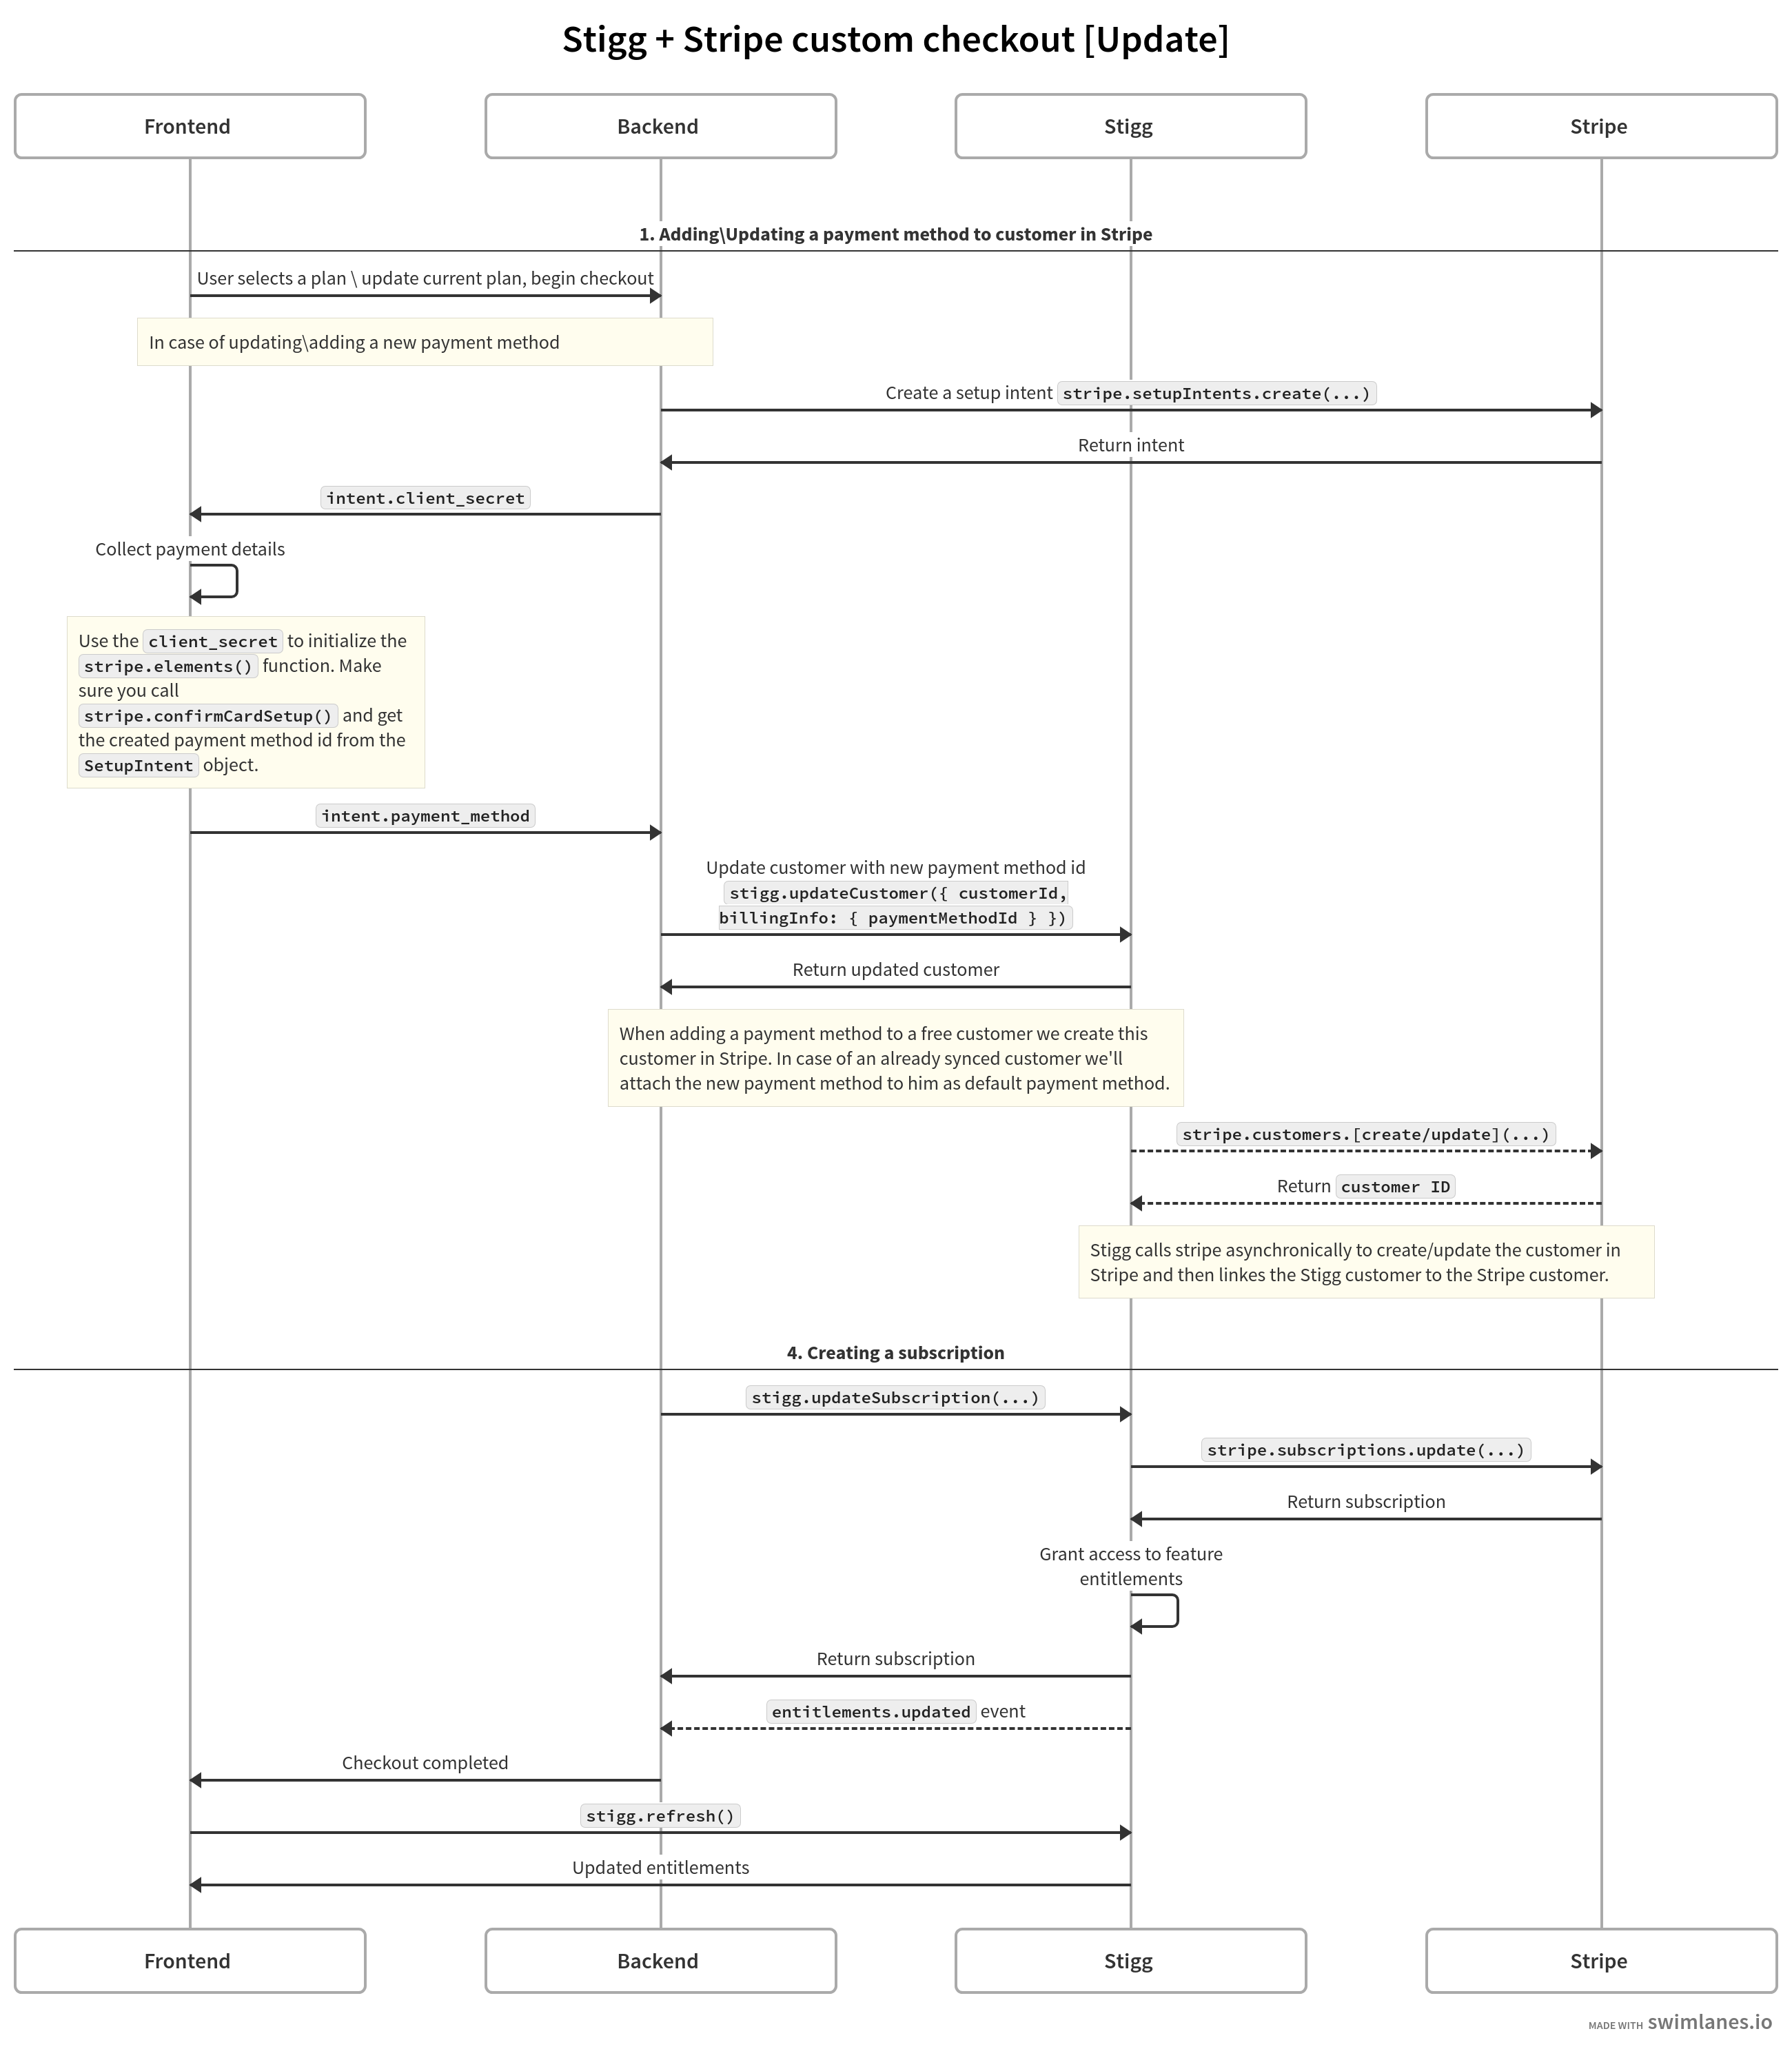
Update an existing subscription
Provisioning a customer
When a new user sign up to your application, provision a customer in Stigg to represent an individual or an organization:Rendering the paywall
To render a paywall inside your application, you can use Stigg’s embeddable widget or render your own pricing plans component based on the data fetched from Stigg: Rendering in-app paywallsTax ID (VAT) collection
Tax ID collection is currently available only for Stigg integrations with Stripe.
-
Tax ID type
Automatically determined by the billing provider (Stripe) based on the customer’s billing address (for example,eu_vat). -
Tax ID value
Explicitly entered by the customer and passed to the billing provider.
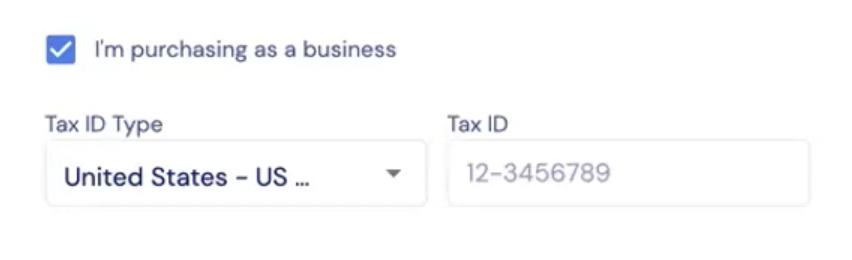
The Tax ID is stored on the customer in the billing system (Stripe) and is used for tax calculation and invoicing.
Updating a customer’s Tax ID
Customers can update or add a Tax ID after checkout by updating their billing details through your application. This typically involves:- Collecting the updated Tax ID from the customer
- Updating the customer in Stigg
- Letting Stigg propagate the change to Stripe
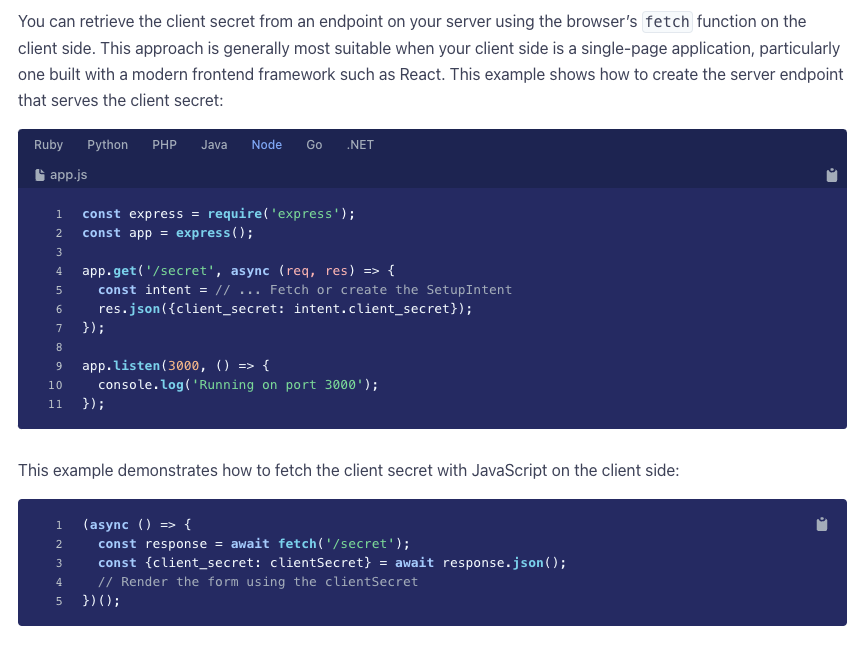
Collecting the customers payment method using Stripe
When a user selects a plan, present the custom checkout form to add the new payment method. According to official Stripe documentation, you should create theSetupIntent for the customer on your backend, and then propagate the returned intent client_secret to the frontend.
It can then be used to initialize the stripe.elements form in a secured manner.
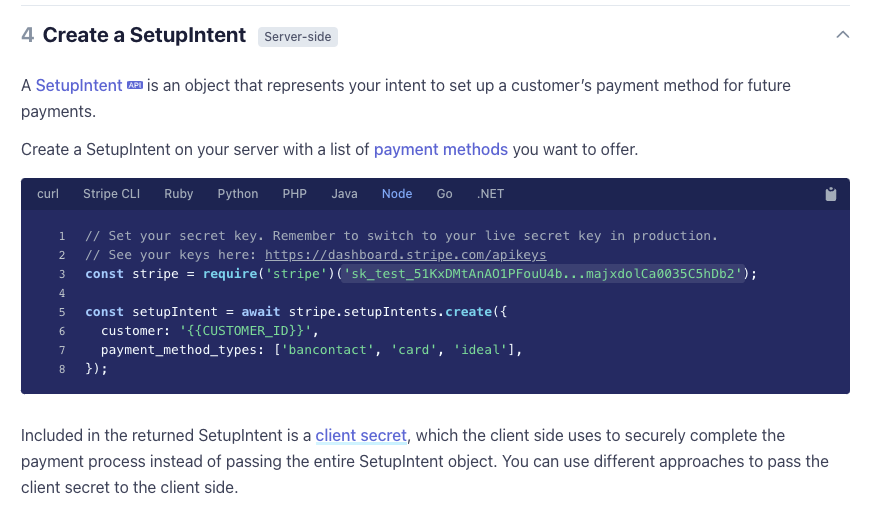
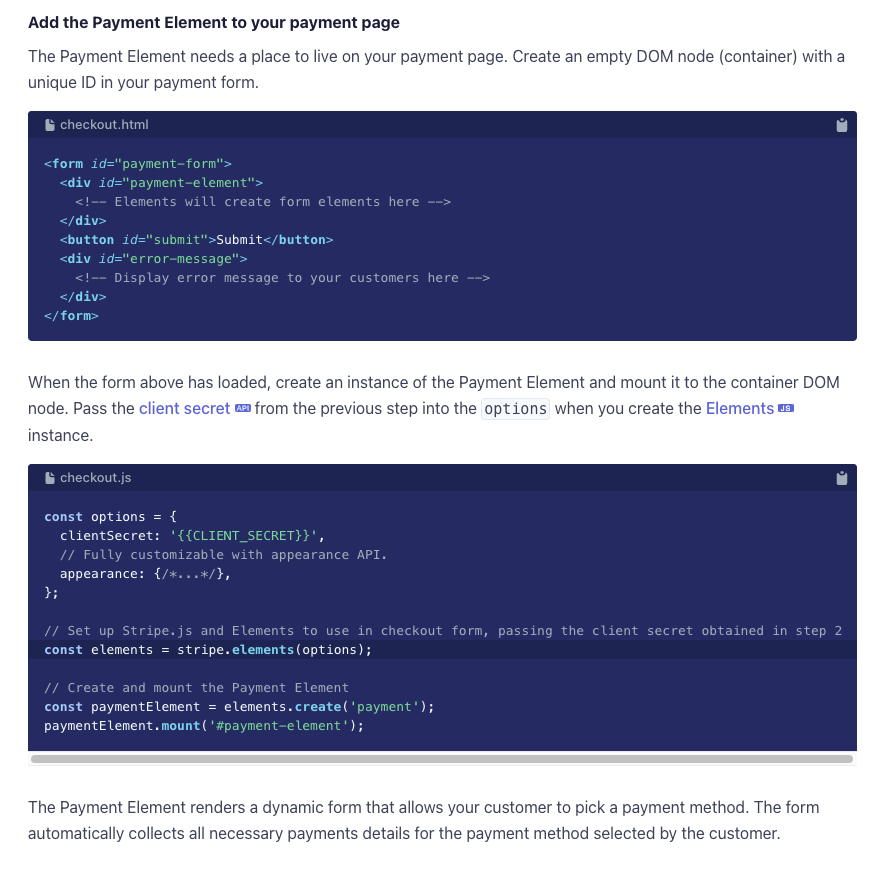
client_secret``stripe.elements()payment_method id on the return value.
Attaching the payment method to the customer in Stigg
You can attach the newly created payment method to a customer in Stigg using by passing the returnedpayment_method ID to the updateCustomer method.
Provisioning a subscription
After attaching the payment method to the customer, provision a subscription in Stigg:Handling successful payments
Once the payment is successful, the subscription will become active in Stigg and the customer will be granted access to the associated entitlements. On the front-end, you should call therefresh function to re-fetch the current customer data and the new entitlements.
entitlements.updated webhook event to update third-party applications.
Handling failed payments
If the payment was not successful or requires additional steps (for example: when 3DS confirmation is required), theprovisionSubscription method will return an appropriate response.
Handling failure of recurring payments
You can notify customers about failed payments by listening to Stigg’scustomer.payment_failed webhook. The customer should be instructed to replace the payment method with a different one and to try again.