How does hardening work?
How can I enable hardening?
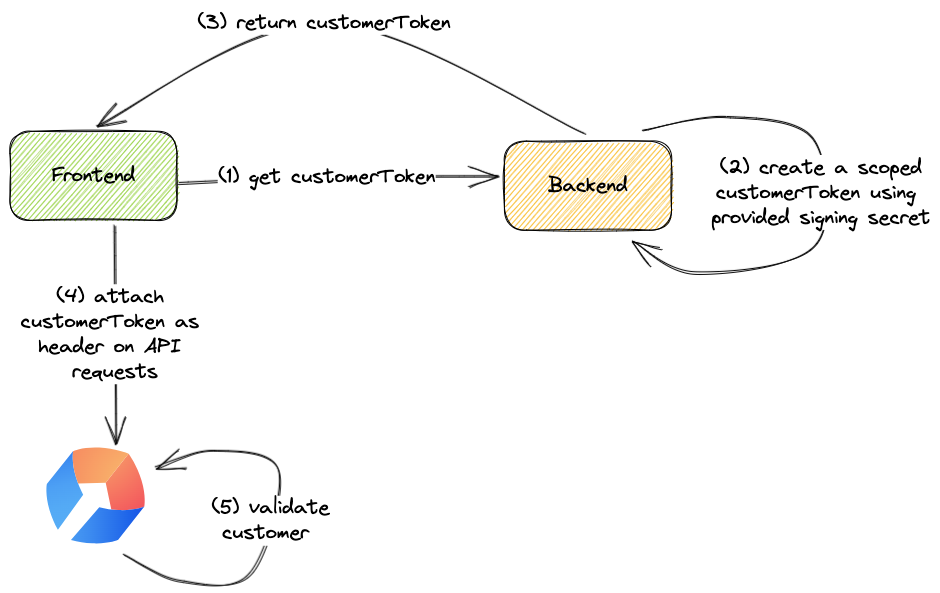
Copy the signing secret from the Stigg app
In the Stigg app, navigate to Integrations > API keys. Click on the Publishable key row to open its detail panel - if hardening is not enabled it will show as “Not enforced”. Under the Overview tab, find the client-side security section. Copy the signing secret.The signing secret is specific per environment.
Generate a customer token in your backend application
In your backend application, identify the handler that returns the user identity to the client side. Generate a customer token using the provided singing secret, for example:For improved security, especially in scenarios where frontend tokens should be short-lived, we recommend using expiring customer tokens.
Provide the customer token in your frontend application
In your frontend application pass thecustomerToken to the Stigg provider.
Enable client-side security enforcement in the Stigg app
In the Stigg app, navigate to Integrations > API keys. Click on the Publishable key row to open its detail panel - when hardening is not enabled it will show as “Not enforced”. Under the Overview tab, find the client-side security section. Set the “Client-side security status” to “Enforced”. Save the changes. Confirm the change.It’s recommended to enable client-side security in each environment in a similar manner to deployment of new functionality in your application, for example: start with development, then enable in staging, and only lastly enable in production.
Read-only access
Stigg allows you to easily add checkout experiences in your application using an embeddable checkout widget. In this flow, the Stigg frontend SDKs can initiate a checkout session directly against the Stigg backend; thus, saving you the need to create a dedicated “checkout” endpoint in your backend. Consequently, this means that the Stigg frontend SDKs can perform write operations in the Stigg platform. When stricter access is required, it’s possible to limit the frontend SDKs to read-only access by adding aro: prefix to the generated customer token.
Read-only tokens can still be used to read credit-related data, such as credit grants, credit balance, credit ledger, credit usage, and auto-recharge settings (for example, via the credit widgets). Only write operations, like initiating a checkout session, are restricted.
Token expiration
Stigg supports expiring customer tokens. If you want tighter client-side security, you can add anexp: prefix to the token payload to define a hard expiration time.
The exp value must be exactly 10 digits and represents Unix time in seconds (UTC), which is seconds since January 01 1970.
Payload format rules
When using expiration, the token payload must follow this order:exp:<10-digit-unix-seconds>must be first.ro:is optional and must be afterexp.customerIdmust be last.
exp:1776509029:customerIdexp:1776509029:ro:customerId
ro:exp:1776509029:customerId
If
exp is more than 10 digits (for example, too far into the future), the token is considered invalid format.