Overview
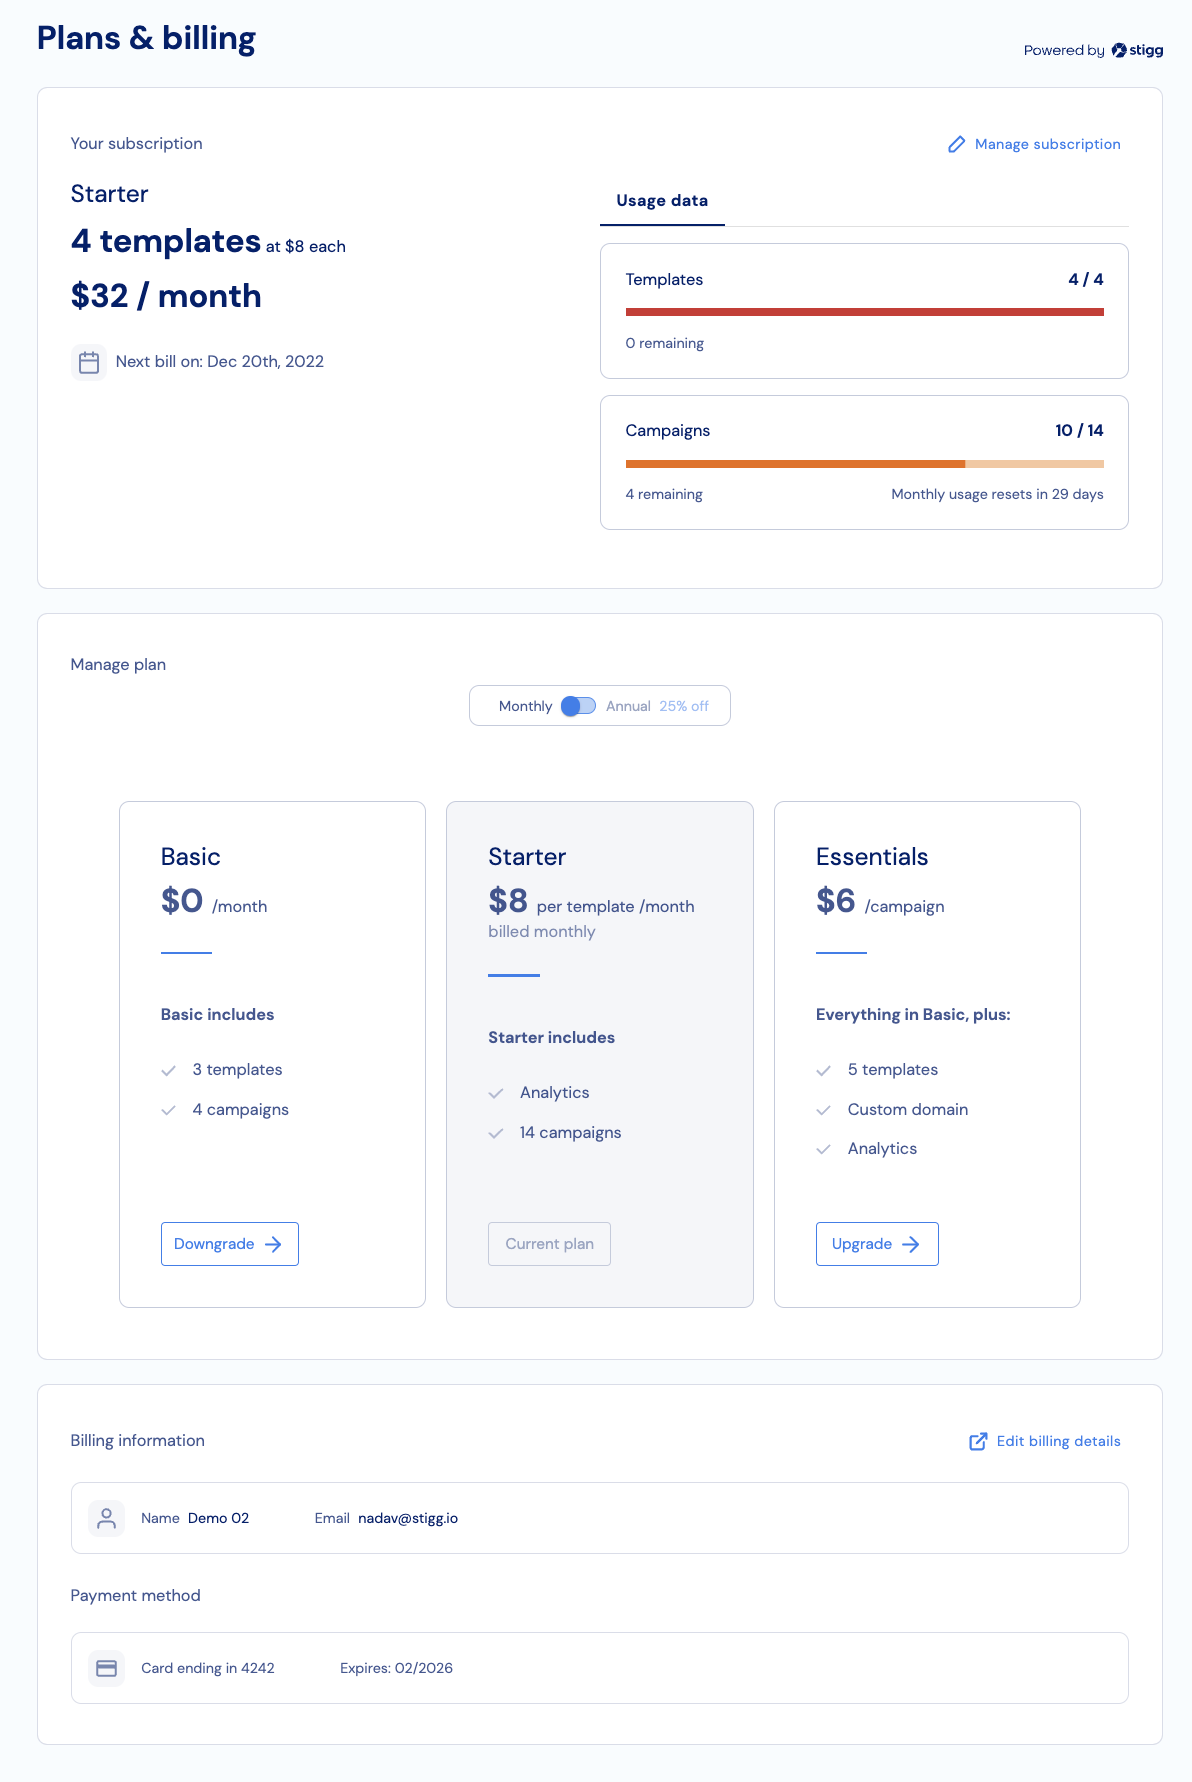
In this quick start guide we’ll demonstrate how to create a customer portal using Stigg’s embeddable widgets.The customer portal widget built to be modular and every component can be used as a standalone so it’s possible to composite and build your own customer portal by using only specific component or build your own unique customer portal layout.
Before we begin
In order to complete this guide in your application code, please make sure that you have:Initializing the React SDK
The first step is to initialize Stigg’s React SDK with the publishable key by wrapping your application with StiggProvider component.React
Rendering the customer portal
Rendering the customer portal can be achieved using 2 steps:- Set the customer ID, the customer ID can usually be retrieved after a customer signs-in or restores their session.
TypeScript
- Use the
CustomerPortalcomponent to render the customer portal.
The CustomerPortal component support component composition so it’s possible to pass as a parameter the Paywall component and it will be rendered inside the customer portal.
React TSX