Overview
The common way to integrate with Stigg is by using Stigg SDKs or API, but it’s also possible to use Stigg’s cloud services and UI to manage your product catalog and subscriptions, but still own a replica of the data, and build a custom integration on top of that. We like to call that “Bring Your Own Solution” (or BYOS) type of integration. If any of the following is true, you might consider the BYOS approach:- You already have an entitlement management solution that provisions customers with access to your product, and switching over is too much effort.
- You prefer not to depend on the availability of Stigg cloud services or SDKs for enforcing access to features.
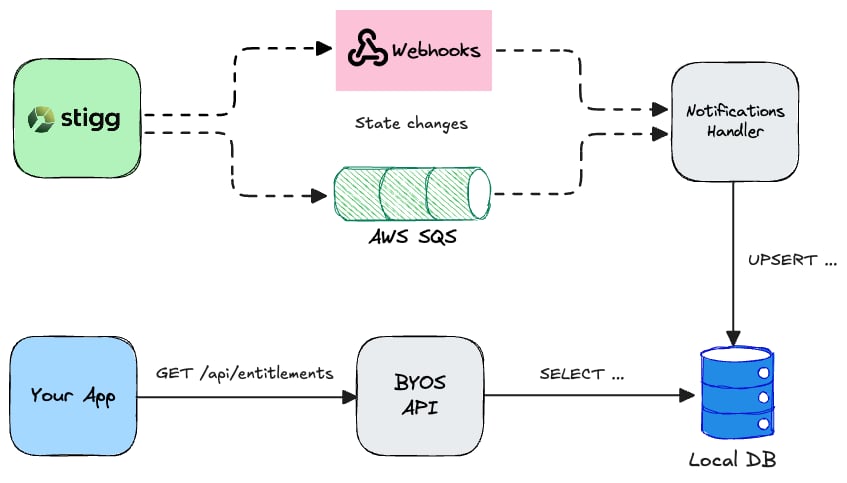
Stigg provides durable queues (e.g., AWS SQS) for delivering notifications instead of webhooks. Contact support if you’d like one provisioned.
Example
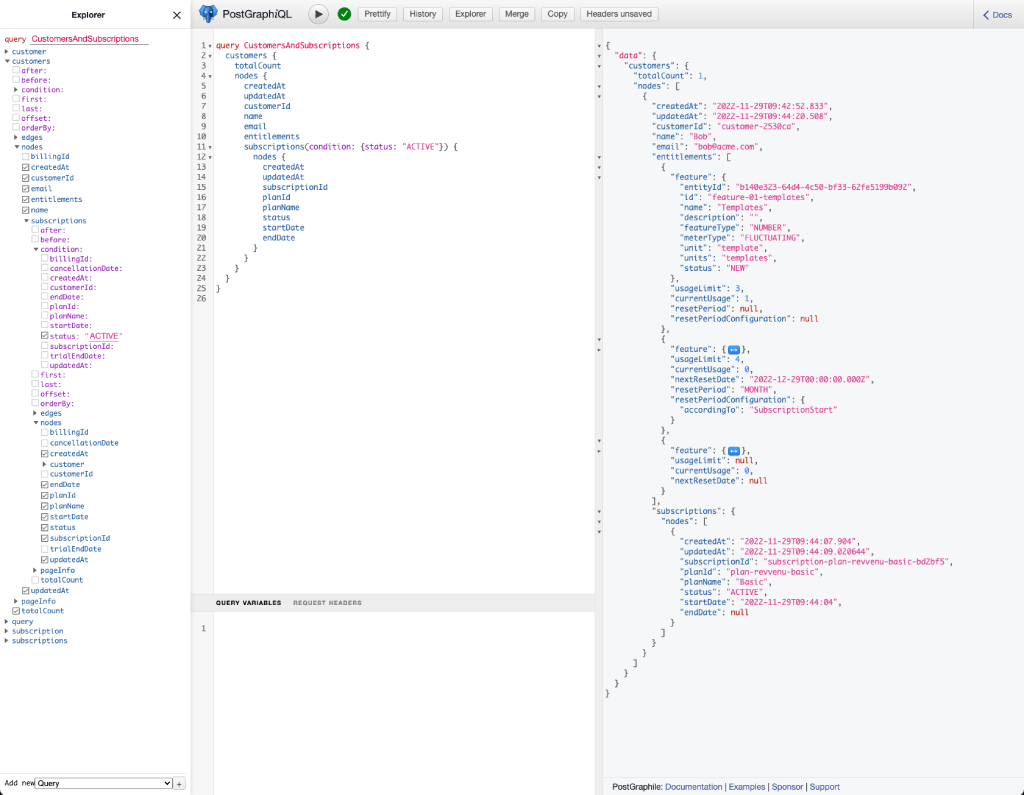
We’ll implement a Node.js Express app and use Postgraphile to generate a GraphQL API based on a relational database schema, for which will use PostgreSQL. The full source code is available here. 1. Preparing the DB and the data model Let’s start by preparing the init script that will define the database schema:/webhook endpoint we’ve just added. Subscribe to the following events:
customer.createdcustomer.updatedcustomer.deletedentitlements.updatedmeasurement.reportedsubscription.createdsubscription.updatedsubscription.canceledsubscription.expiredsubscription.trial_expired
postgraphile middleware to our express app:
/graphiql) and run queries like so:
checkAccessfunction can be found here.
Source code
For your convenience, we prepared a runnable example project that demonstrates this approach. You can find the source code of the example on GitHub👇Stigg BYOS integration example
An example of integrating Stigg using webhooks to sync entitlements into your own database, exposing a GraphQL API and access checks.